Banner Adzones helps you to manage your mediabuying, flat rate deals, direct deals and more.
Usage guide to create a campaign, connect it to an Adzone and use the iframe code to display your ad(s) in websites or adnetworks you are buying traffic from.
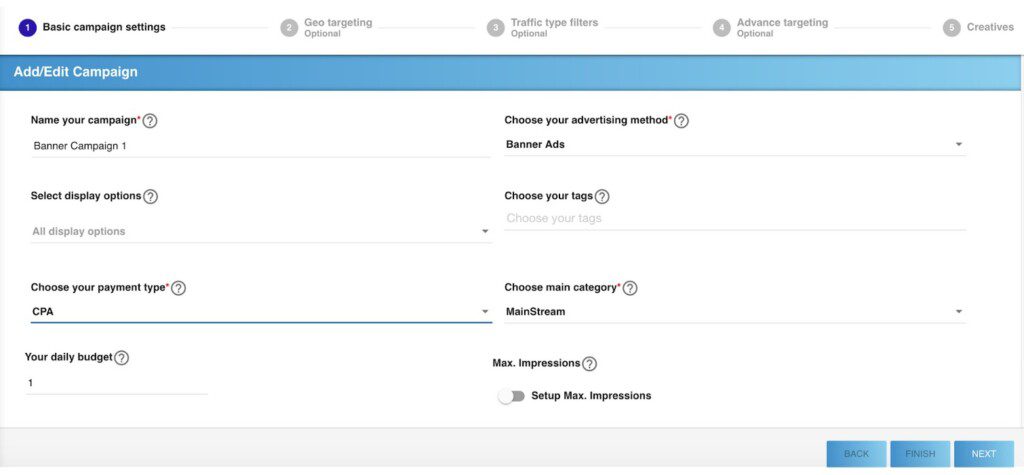
1 – Create a Banner Campaign and setup any “pre-filter” (if needed).
Advertising > Campaigns > Create New Campaign
- Make sure to select the correct “MainCategory” for the campaign.
- Set “Payment type” of the campaign on CPA
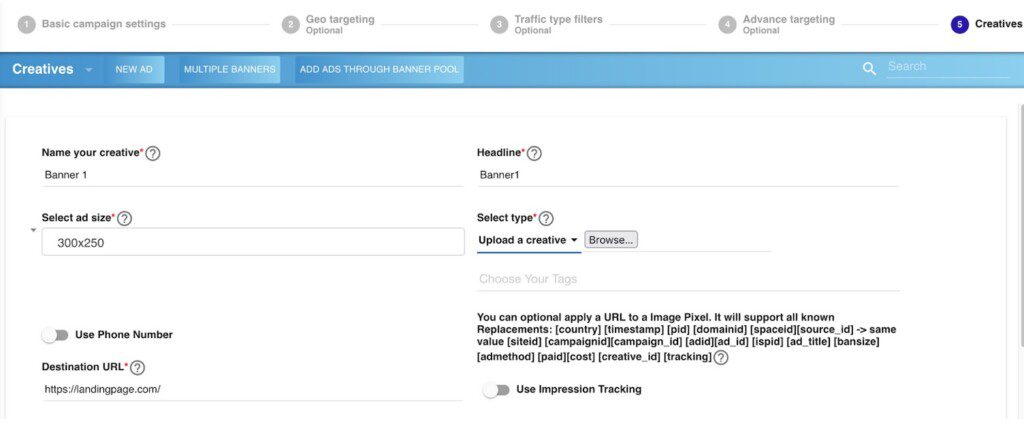
1.1 – Add Banners
Campaign settings > Step 5
- Here you can upload banners or select banners from your “Media Bank”. It is also possible to use tokens / replacements for tracking (check below).
- Any Uploaded media (banners / videos) will be saved in the “Media bank” then you can “reuse” media in other campaigns.
- Have in mind that any add/update you do could take up to 1 / 2 minutes before going live and for media uploads it could take up to 5 minutes to get synced in our whole network.
You can optionally apply a URL to an Image Pixel. It will support all these available Replacements:
[tracking] – ClickID
[country] – Country
[timestamp] – Time
[pid] – PublisherID
[domainid] – Domain ID
[spaceid] – Space ID
[source_id] – Same value [siteid]
[campaignid] – Campaign ID
[adid] – Ad ID
[ispid] – Isp ID
[ad_title] – Ad Title
[bansize] – Banner Size
[admethod] – Ad Method
[paid] – Cost
[creative_id] – Creative ID
- If needed you could replace [] with {}, example: [spaceid] > {spaceid}
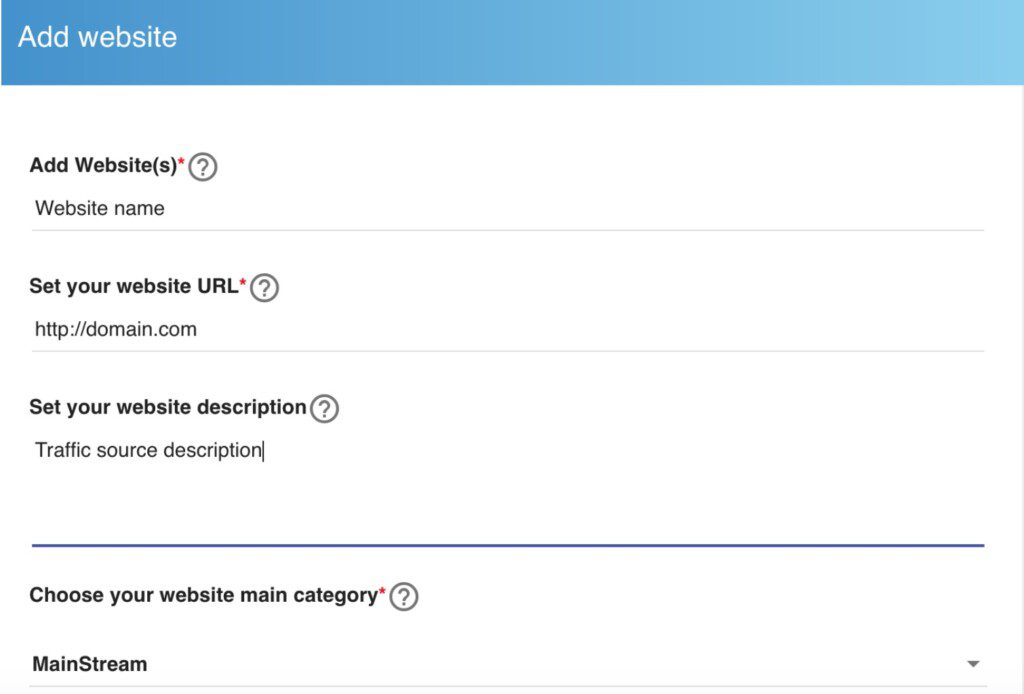
2 – Create / Add the Website or network url where you are going to display the Adzone.
Publishing > Websites > New Website
Make sure to select the correct “MainCategory” as this is one of the options you have to “organize” campaigns.
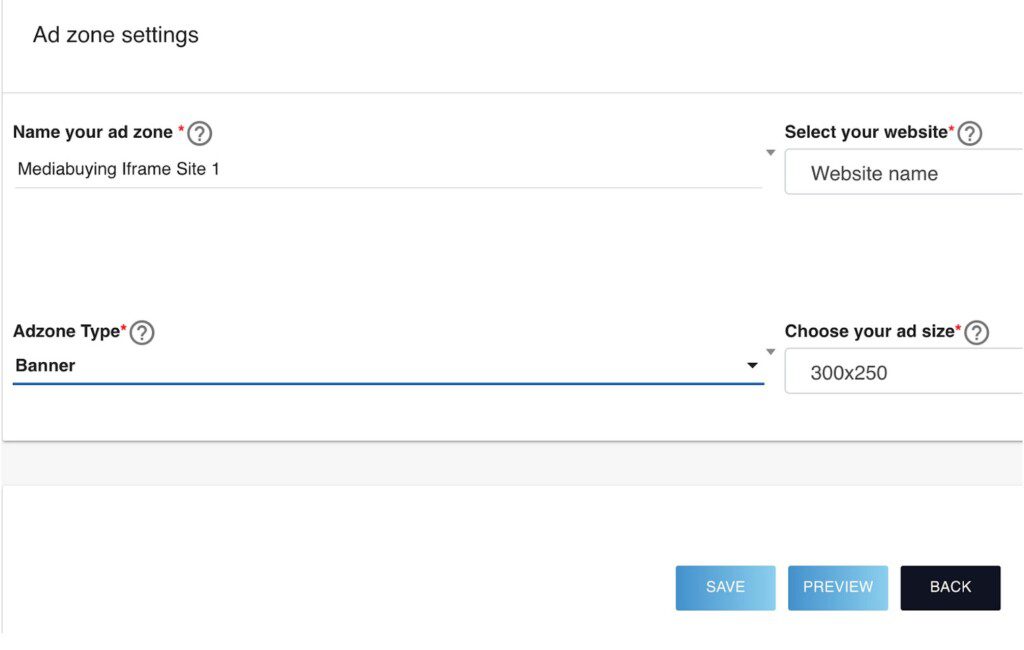
3 – Add / Create a Banner Adzone
Publishing > Ad Zones > New Adzone
Go to the “Ad Zones” menu, make sure you have selected your recently added Website.
> Full Adzone creation tutorial here
4 – Connecting Campaigns and Ad zones
Once you have created the Adzone, click “WhiteListed Campaigns”, next click “Add Campaigns“.
Now select the campaign(s) that you want to connect with the Adzone (created in step 1) and click “Add Selected”
- Make sure you have selected the correct campaign before connecting it to the Adzone.
Once you have connected campaigns to the Adzone, you will be able to set weight / priority per campaign. Higher weight will get more exposure.
4.1 – Getting the Iframe code
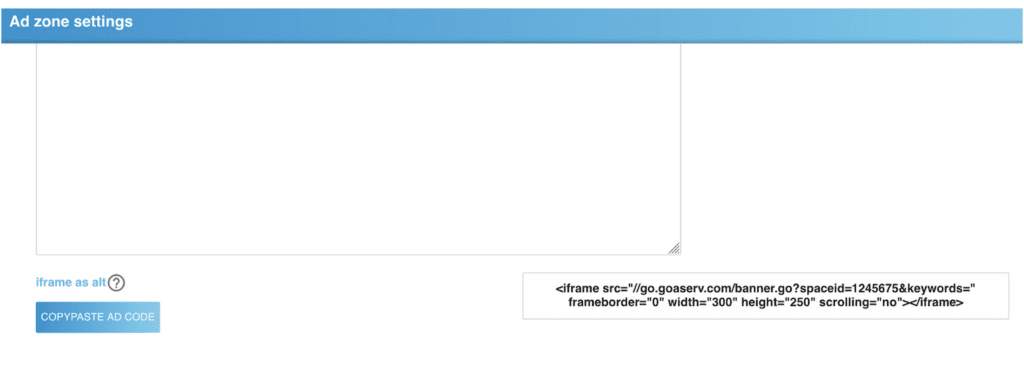
When you edit the Ad zone, click “Ad zone code” and search “Iframe Code”.
5 – Using the iframe code
Once all settings are finished, you have to copy the iframe code or extract the iframe url from it and use it on any Adnetwork or Website you are buying traffic from.
If you need different Ad zones for the same Website, just create a new campaign if needed and then create the Ad Zone (step 3).

